MyLife: Google Cloud Storage Support
Posted: Last updated:UPDATE Jan 5th, 2017: These steps are not necessary if you are starting your MyLife instance in 2017 or later, only if you started it earlier and were using the Blobstore for images.
Why am I changing MyLife?
When I originally created MyLife I thought I could just make it and let it run forever. I didn't really want a lot of features, so I just made the initial version, then added Dropbox support and then I thought I was done! Unfortunately Google App Engine is now deprecating the files api that I was using for images and import/export, and they want you to use Google Cloud Storage instead. Since I want to continue using MyLife I went and added support for Google Cloud Storage and added a migration option to move your existing images from the old Blobstore to your new Google Cloud Storage bucket!
How do I update to the new version?
First of all you can go to https://github.com/einaregilsson/MyLife/releases and download the zip file there. Before you actually update the app though, you should check to see if you already have a Google Cloud Storage bucket for your app. Google keeps changing their App Engine dashboard, moving things around and removing some things. So, start by going to http://appengine.google.com, select your project to see the App Engine dashboard. Then go to Administration->Application Settings. If your screen there has a Google Cloud Storage bucket like in the screenshot below then you're good to go.
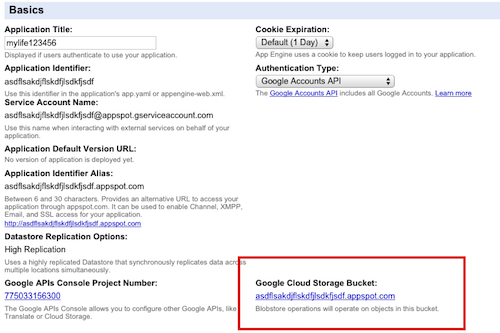
If there's no bucket there then go to the bottom of the page, under Cloud Integration. There should be a button there to create a cloud project, press that and wait a while, then you should have a Cloud Storage bucket. Do not try to create the bucket manually, if you do that it will not fall under the free App Engine quota.

Once you have the bucket ready then you can upload the new version of the code. Go into the folder where you unzipped the source and type:
That should publish the new version of the code. Once that's done you should go to the web interface at https://yourappid.appspot.com and try writing a post and uploading a couple of images, just to make sure the storage bucket is working.
Final step: Migrating existing images
The new version of the code does not serve images from the old Blobstore. You need to migrate them to your shiny new Cloud Storage bucket. To do that you can go to the Settings page in your app, and at the bottom you should see this:
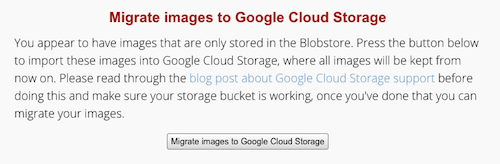
Press the large button and your existing images should be migrated to the Google Cloud Storage bucket. It might take a while. Once that's done you're fully upgraded to the new version, and hopefully won't have to upgrade ever again!!! :)